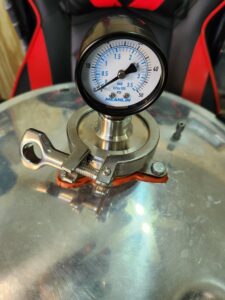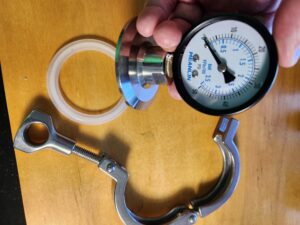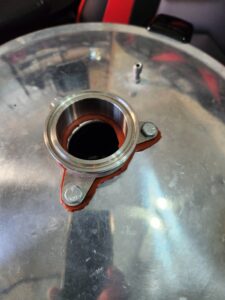


You can use the modified kitchen distilling pot to also do canning. With a sanitary plate with a gauge mounted to it and a clamp, you are all set to can 16 full mason jars (16 oz size).
Canning with Mason jars is a popular method for preserving food at home. It involves placing food into Mason jars and then heating them to a temperature that destroys microorganisms and inactivates enzymes that could cause the food to spoil. This process also creates a vacuum seal that prevents new microorganisms from entering and spoiling the food.
Here’s a basic guide on how to can with Mason jars:
What You’ll Need
- Mason jars with new lids and bands
- A large canning pot with a rack
- Jar lifter or tongs
- Funnel
- Ladle
- Clean cloths or paper towels
- Ingredients for your recipe (fruits, vegetables, vinegar, sugar, etc.)
Steps for Canning with Mason Jars
1. Prepare Your Recipe
- Prepare the food you want to can according to your recipe. This could be jams, pickles, fruits, vegetables, or sauces.
2. Sterilize the Jars and Lids
- Wash the jars, lids, and bands in hot, soapy water. Rinse well.
- Keep the jars warm until they are ready to be filled. You can leave them in a pot of simmering water or a heated dishwasher.
3. Fill the Jars
- Use a funnel to fill the jars with your prepared food. Leave the appropriate headspace (usually about 1/2 inch to 1 inch, depending on the recipe).
- Remove any air bubbles by running a clean knife or a bubble remover tool around the inside edge of the jar.
- Wipe the rim of the jar with a clean cloth or paper towel to ensure a good seal.
4. Seal the Jars
- Place the lids on the jars, ensuring the sealing compound is in contact with the rim.
- Screw on the bands until they are fingertip tight.
5. Process the Jars
- Place the jars in the canning pot on the rack, ensuring they are covered by at least 1-2 inches of water.
- Bring the water to a boil and process the jars for the time specified in your recipe.
- Keep the water boiling and ensure the jars are covered with water throughout the process.
6. Cool and Store
- After processing, turn off the heat and let the jars sit in the water for 5 minutes.
- Remove the jars using a jar lifter or tongs and place them on a towel or cooling rack.
- Let them cool for 12-24 hours without disturbing them.
- Check the seals (the lids should be concave and should not flex when pressed).
- Label and store the jars in a cool, dark place.
Safety Tips
- Always use recipes and processing times that have been tested to ensure safety.
- Do not reuse lids for canning. Bands can be reused if they are not rusty or bent.
- If a jar does not seal after cooling, refrigerate it and use the contents soon, or reprocess within 24 hours using a new lid.
Canning is a rewarding way to preserve food, but it’s important to follow safety guidelines closely to prevent foodborne illnesses.
